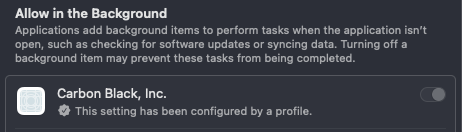
With the profile earlier in the series, a admin user would be able to disable Carbon Black from running in the background and so, stop it from running all together.
So, let us add two extra options to the profile by adding a version.
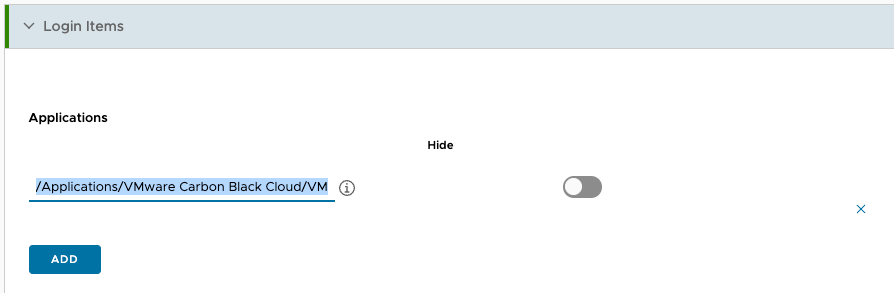
Open the profile and look for “Login Items”. Here you want to add Carbon Black to the applications section.
ex.: /Applications/VMware Carbon Black Cloud/VMware CBCloud.app
The second part is under the “Login and Background Items” section. Allow Carbon Black to run in the background based on the Team Identifier.
ex.: 7AGZNQ2S2T
For me, this resulted in an error and it seems to be a bug in the interface.
Go to the “System Extensions” section and remove the parts that are not in use. Heads up, they will get added again on saving the profile.
That’s it. Save and assign and you are good to go. Hope this helps!
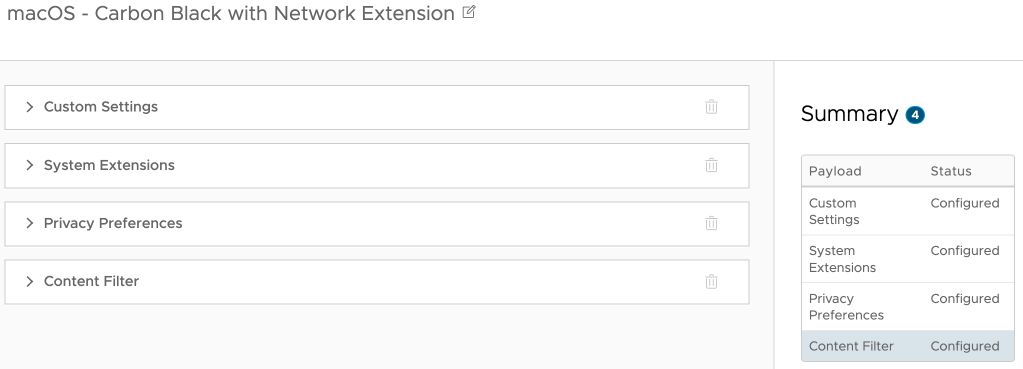
I recently came across a Workspace ONE UEM profile for Carbon Black that only had the system extension enabled. True, the first parts are maybe better documented, but to get the content filter working you also need to enable that, so in total you need 4 payloads:
So, I made a copy of the profile and added the content filter part. Below the screenshot you’ll find the different parts to copy paste into the profile:
Filter type: Plug-in
Filter Name: VMware Carbon Black Cloud Network Extension Filter
Identifier: com.vmware.carbonblack.cloud.se-agent
Filter WebKit Traffic: Enabled
Filter Socket Traffic: Enabled
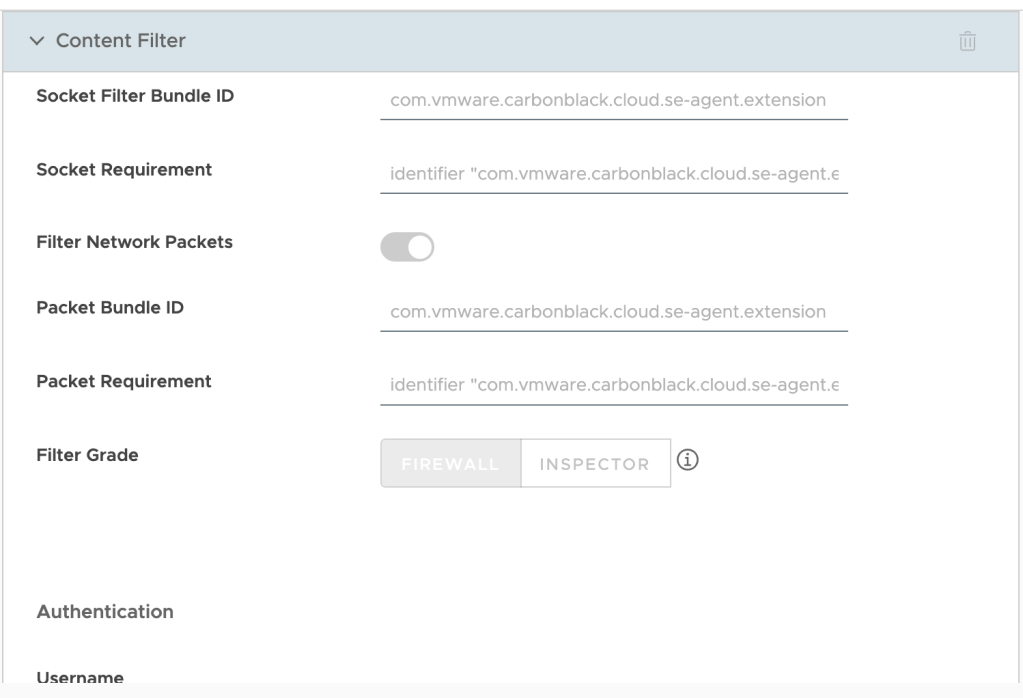
Socket Filter Bundle ID: com.vmware.carbonblack.cloud.se-agent.extension
Socket Requirement: identifier "com.vmware.carbonblack.cloud.se-agent.extension" and anchor apple generic and certificate 1[field.1.2.840.113635.100.6.2.6] /* exists */ and certificate leaf[field.1.2.840.113635.100.6.1.13] /* exists */ and certificate leaf[subject.OU] = "7AGZNQ2S2T"
Filter Network Packets: Enabled
Packet Bundle ID: com.vmware.carbonblack.cloud.se-agent.extension
Packet Requirement: identifier "com.vmware.carbonblack.cloud.se-agent.extension" and anchor apple generic and certificate 1[field.1.2.840.113635.100.6.2.6] /* exists */ and certificate leaf[field.1.2.840.113635.100.6.1.13] /* exists */ and certificate leaf[subject.OU] = "7AGZNQ2S2T"
You can validate the profile in macOS settings under Network > VPN & Filters > Filters & Proxies. There you should see the Carbon Black Content Filter as Enabled.
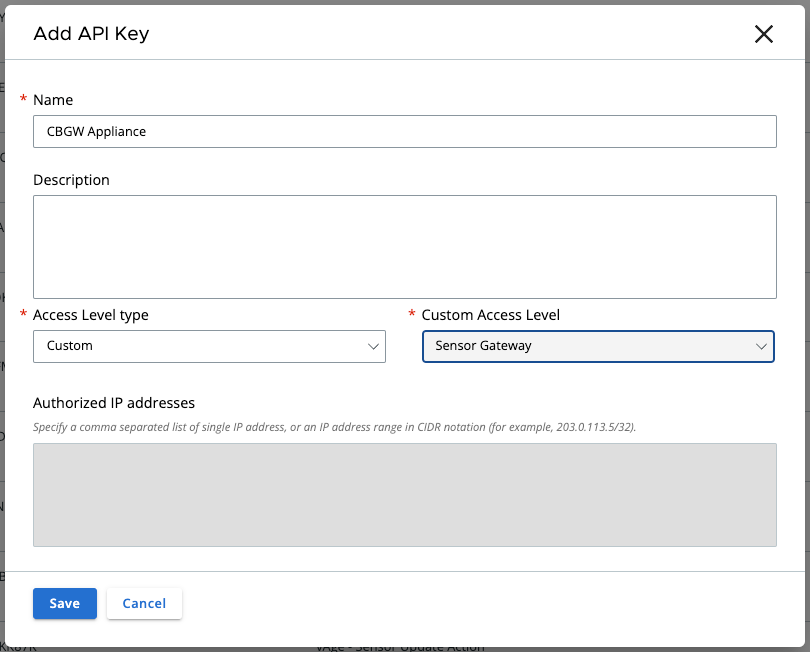
First thing is to do a little preparation. In Carbon Black Cloud console you’ll need to set up an API key so the appliance can communicate with the cloud console.
Go to Settings > API Access and select “Add API Key”. Set the access level to custom and select Sensor Gateway from the custom access level drop down list:
Save the information as we’ll need it later.
Next is to generate a certificate that will be used on the appliance. You can skip this part if you use self-signed certificates instead but if you go with certificates you’ll the certificate in pem format with private key file and also the full chain, so including the appliance certificate.
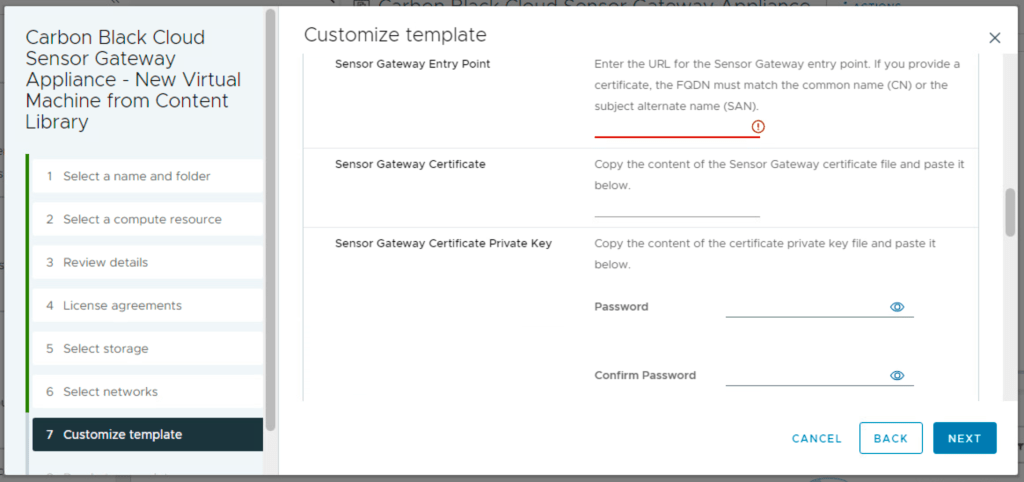
The entry point is the FQDN (preceded by https://) of the appliance (this information must match the certificate common name or san). The certificate line accepts more then just one line of data. You can put in the data from the pem certificate file. Same for the private.
Remember in the certificate chain put the full chain, so the certificate again and then intermediate (if used) and the root certificate. Passphrase is used if the certificate is encrypted with a password.
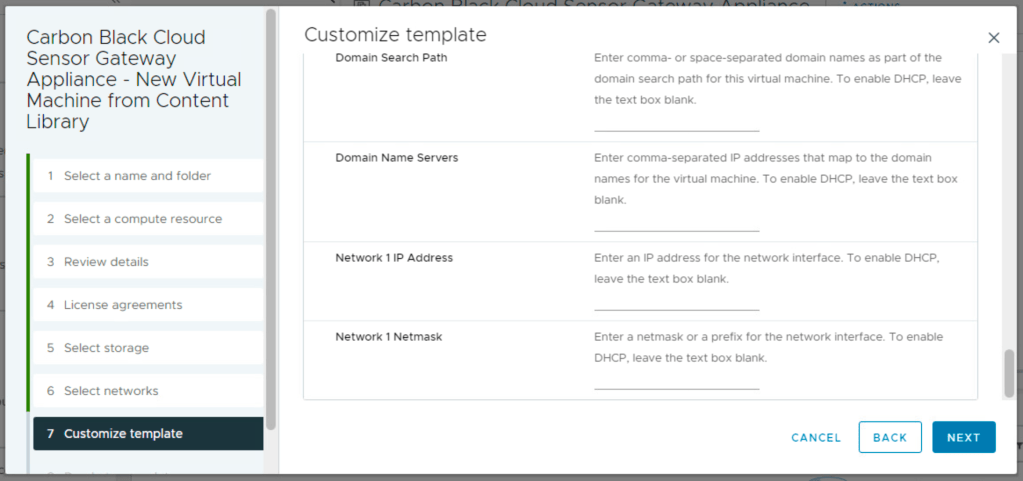
Last thing before deployment is the network information part.
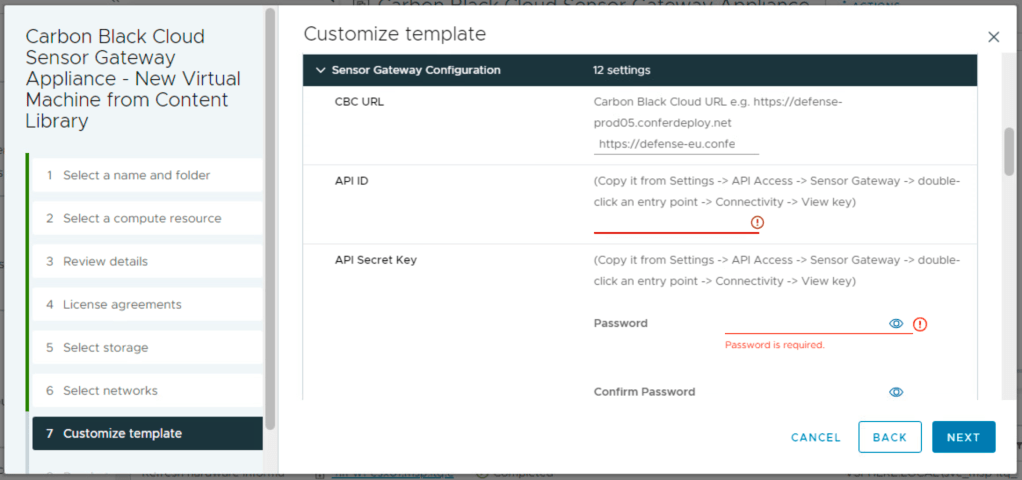
After you boot the appliance you will see that it registers itself in the Carbon Black Cloud console under Settings > API Access > Sensor Gateways.
Now for the installation part of the sensors. You’ll see that you now have an option to generate a registration key through a Sensor Gateway. All devices installed with this new key will connect threw the Sensor Gateway Appliance instead of registering directly to Carbon Black Cloud console.
We recently came across a Carbon Black Workload appliance not picking up the new vCenter virtual machines. The plugin seemed to be working fine in vCenter but the inventory did not show any of the new machines.
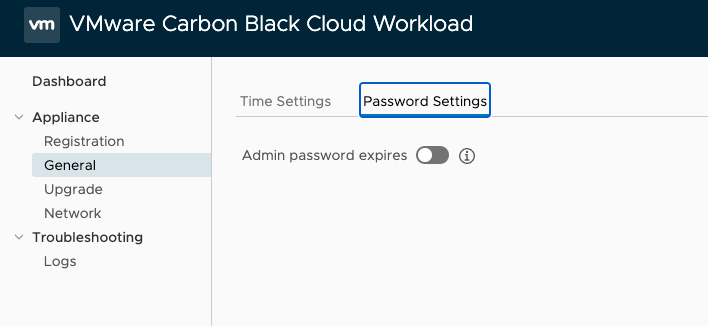
Going to the appliance web interface and trying to log in revealed the password had expired.
Going in the vm console from vCenter, the appliance instantly asked to change the password, we did not have to use the following procedure. After the change we could log in to the web interface once again where the Carbon Black Plugin showed red for a few seconds and then turned green again:
After 10 to 15 minutes the virtual machines came visible in the plugin. We ended up disabling the admin password expiry to prevent this from happening again.
First thing is to download the OVA. Head over to VMware customer connect and download the Carbon Black Cloud Workload Protection Appliance OVA.
While downloading, in Carbon Black Cloud console under Settings > API Access > Access Levels create a custom API access level with the following permissions:
Category
Permission Name
Notation Name
CREATE
READ
UPDATE
DELETE
EXECUTE
Appliances
Send workload assets to CBC
inventory.collector.vcenter
Yes
Appliances
Appliances Registration
appliances.registration
Yes
Yes
Yes
Yes
Device
Sensor kits
org.kits
Yes
Device
Quarantine
device.quarantine
Yes
Device
General information
device
Yes
Live Query
Manage queries
livequery.manage
Yes
Yes
Yes
Yes
Vulnerability
Vulnerability Assessment Data
vulnerabilityAssessment.data
Yes
Yes
Workload Management
View Workloads without sensors
workloads.vcenter.vm
Yes
Workload Management
Install sensor on vCenter workload
workloads.vcenter.vm_sensor_install
Yes
Next thing in Carbon Black Cloud console under Settings > API Access > API Keys is to create an API key using the above access level. Save the information together with the ORG KEY that you find on the same page.
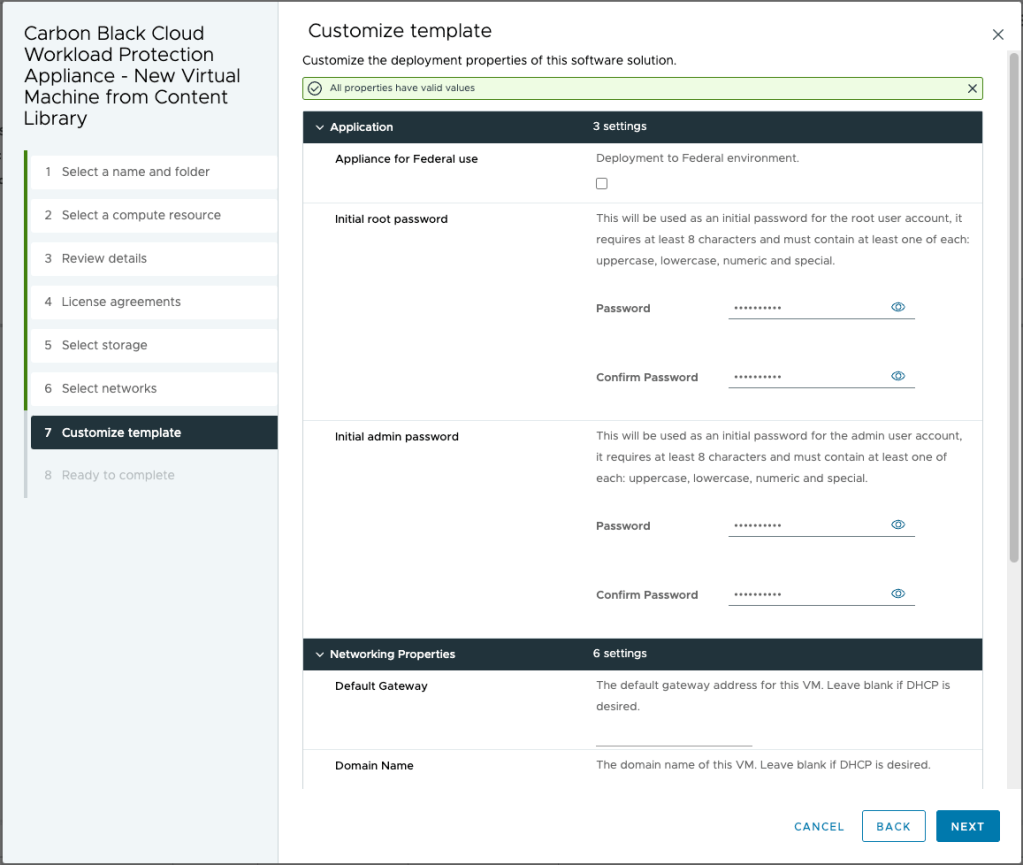
Hopefully by now the download has finished. Head over vcenter and deploy the OVA and supply passwords for both root and admin account. Depending on your network infrastructure fill in the network information or leave blank for DHCP.
After deployment power on the appliance, fill in credentials and log in to the appliance.
The appliance is online but it still lacks communication with VMware vCenter and Carbon Black Cloud. Head to Appliance > Registration and provide the information for vcenter and the API information for connection to Carbon Black Cloud console.
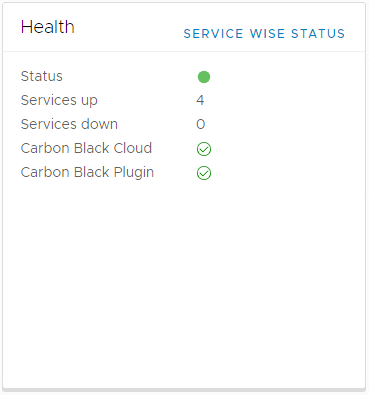
If you done everything correctly it should all be green in the dashboard.
However, if like me, you messed up the ip configuration go to the vm console, change the ip information using the bellow command and reboot the appliance.