dewyser.net

solutions, scripting and more

Setting up Carbon Black sensor gateway appliance — 29th Nov 2023

Setting up Carbon Black sensor gateway appliance

First thing is to do a little preparation. In Carbon Black Cloud console you’ll need to set up an API key so the appliance can communicate with the cloud console.

Go to Settings > API Access and select “Add API Key”. Set the access level to custom and select Sensor Gateway from the custom access level drop down list:

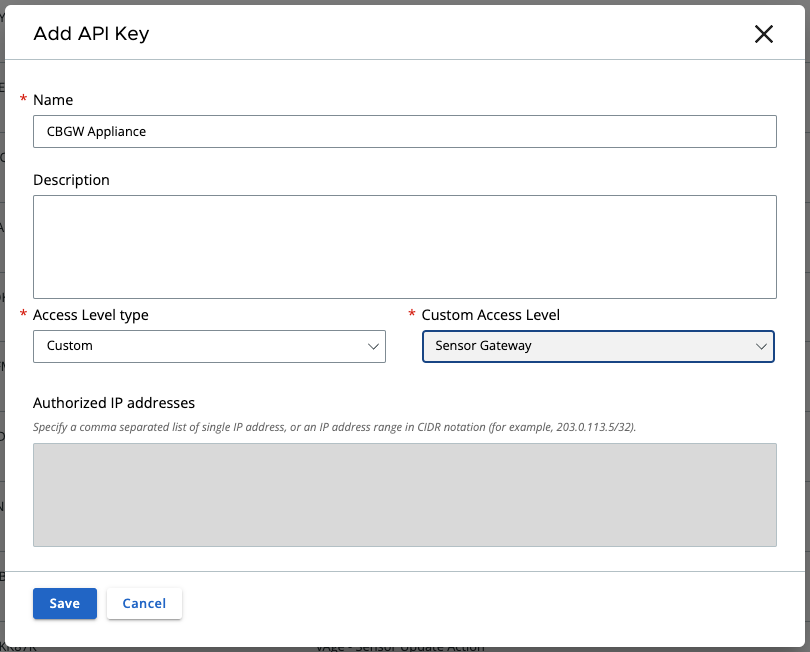
Save the information as we’ll need it later.

Next is to generate a certificate that will be used on the appliance. You can skip this part if you use self-signed certificates instead but if you go with certificates you’ll the certificate in pem format with private key file and also the full chain, so including the appliance certificate.

Now we can deploy and configure the virtual appliance. For the CBC URL you can find the necessary information here: https://developer.carbonblack.com/reference/carbon-black-cloud/authentication/#hostname. The API ID and secret you saved before.

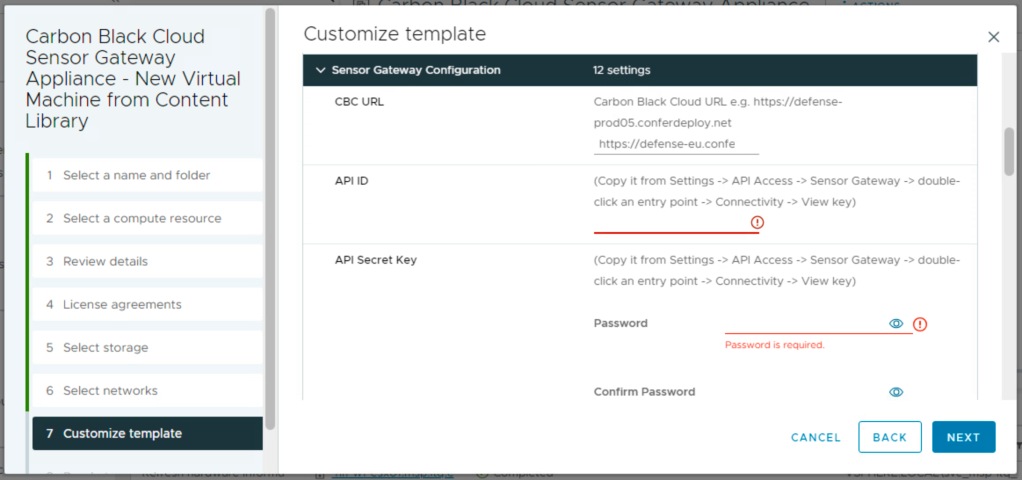
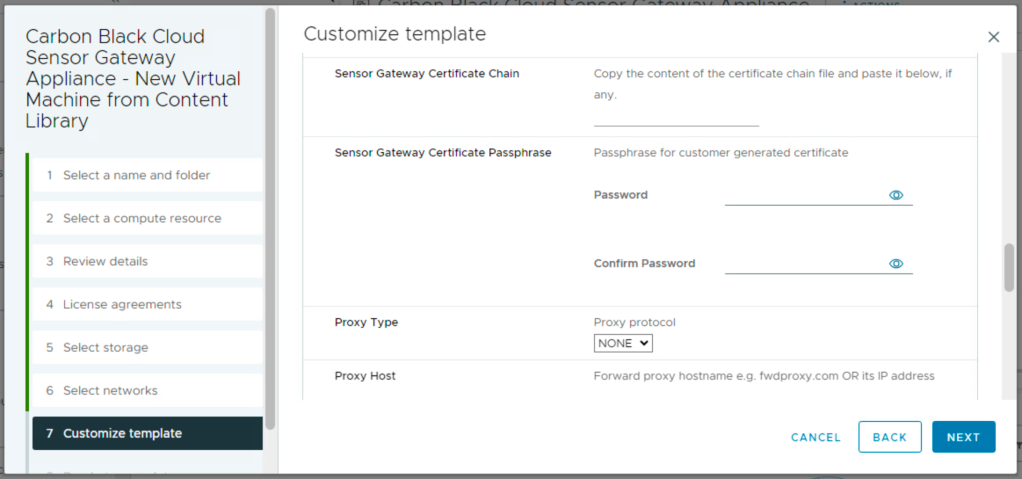
The entry point is the FQDN (preceded by https://) of the appliance (this information must match the certificate common name or san). The certificate line accepts more then just one line of data. You can put in the data from the pem certificate file. Same for the private.

Remember in the certificate chain put the full chain, so the certificate again and then intermediate (if used) and the root certificate. Passphrase is used if the certificate is encrypted with a password.

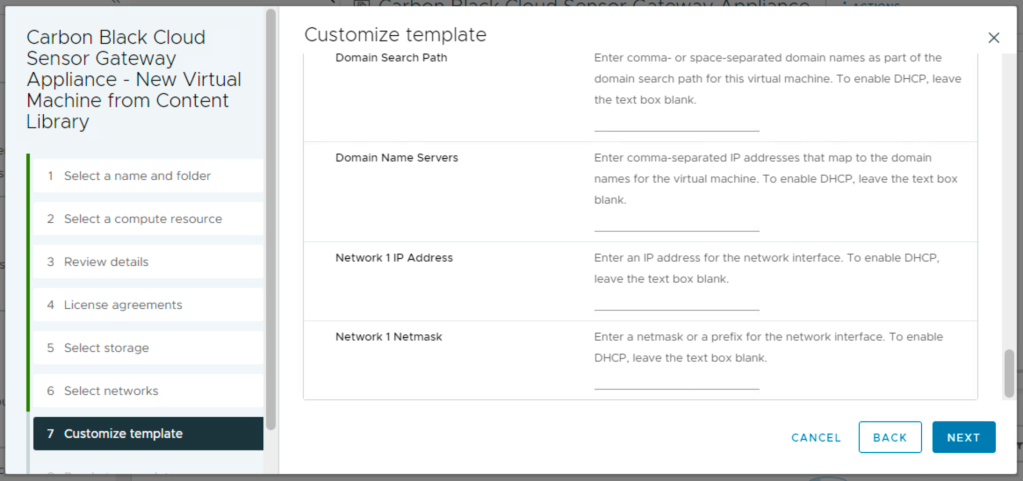
Last thing before deployment is the network information part.

After you boot the appliance you will see that it registers itself in the Carbon Black Cloud console under Settings > API Access > Sensor Gateways.

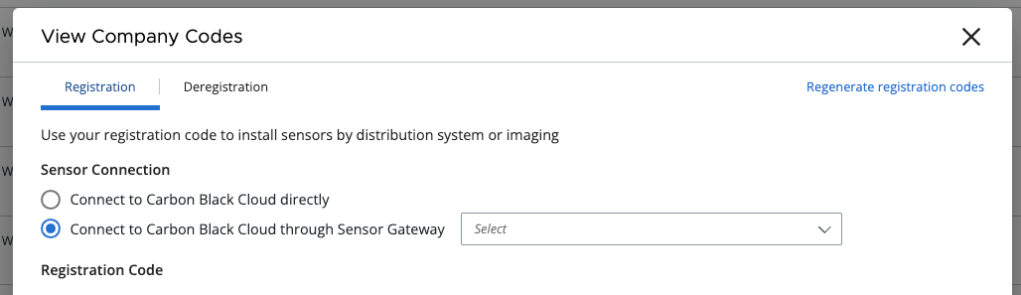
Now for the installation part of the sensors. You’ll see that you now have an option to generate a registration key through a Sensor Gateway. All devices installed with this new key will connect threw the Sensor Gateway Appliance instead of registering directly to Carbon Black Cloud console.

Carbon Black Workload not picking up new virtual machines in vCenter — 17th Nov 2023

Carbon Black Workload not picking up new virtual machines in vCenter

We recently came across a Carbon Black Workload appliance not picking up the new vCenter virtual machines. The plugin seemed to be working fine in vCenter but the inventory did not show any of the new machines.

Going to the appliance web interface and trying to log in revealed the password had expired.

Going in the vm console from vCenter, the appliance instantly asked to change the password, we did not have to use the following procedure. After the change we could log in to the web interface once again where the Carbon Black Plugin showed red for a few seconds and then turned green again:

After 10 to 15 minutes the virtual machines came visible in the plugin. We ended up disabling the admin password expiry to prevent this from happening again.

Setting up the Carbon Black Workload Appliance — 14th Nov 2023

Setting up the Carbon Black Workload Appliance

First thing is to download the OVA. Head over to VMware customer connect and download the Carbon Black Cloud Workload Protection Appliance OVA.

While downloading, in Carbon Black Cloud console under Settings > API Access > Access Levels create a custom API access level with the following permissions:

CategoryPermission NameNotation NameCREATEREADUPDATEDELETEEXECUTE
AppliancesSend workload assets to CBCinventory.collector.vcenterYes
AppliancesAppliances Registration
appliances.registration
YesYesYesYes
DeviceSensor kitsorg.kitsYes
DeviceQuarantinedevice.quarantineYes
DeviceGeneral informationdeviceYes
Live QueryManage querieslivequery.manageYesYesYesYes
VulnerabilityVulnerability Assessment DatavulnerabilityAssessment.dataYesYes
Workload ManagementView Workloads without sensorsworkloads.vcenter.vmYes
Workload ManagementInstall sensor on vCenter workloadworkloads.vcenter.vm_sensor_installYes

Next thing in Carbon Black Cloud console under Settings > API Access > API Keys is to create an API key using the above access level. Save the information together with the ORG KEY that you find on the same page.

Hopefully by now the download has finished. Head over vcenter and deploy the OVA and supply passwords for both root and admin account. Depending on your network infrastructure fill in the network information or leave blank for DHCP.

After deployment power on the appliance, fill in credentials and log in to the appliance.

The appliance is online but it still lacks communication with VMware vCenter and Carbon Black Cloud. Head to Appliance > Registration and provide the information for vcenter and the API information for connection to Carbon Black Cloud console.

If you done everything correctly it should all be green in the dashboard.

However, if like me, you messed up the ip configuration go to the vm console, change the ip information using the bellow command and reboot the appliance.

/opt/vmware/share/vami/vami_set_network eth0 STATICV4 <ip> <mask> <gateway>