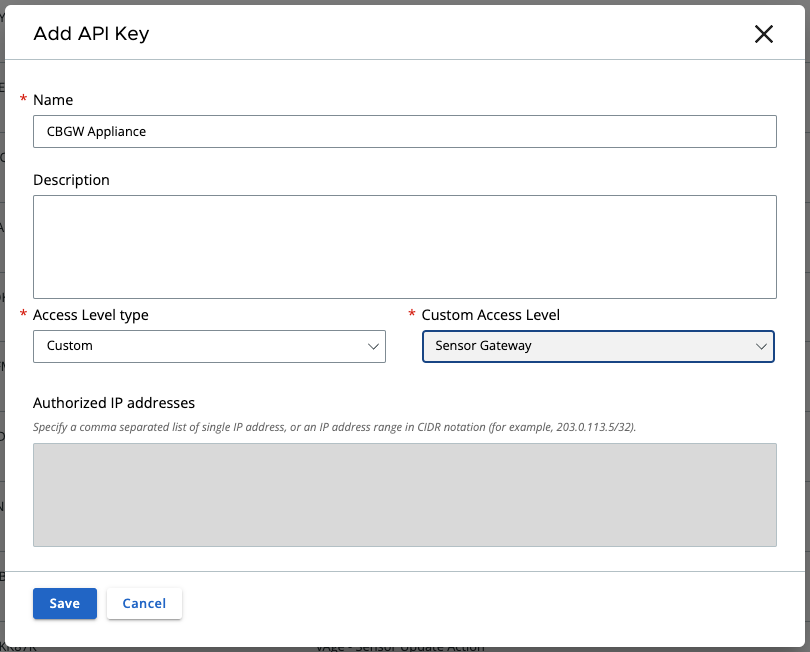
First thing is to do a little preparation. In Carbon Black Cloud console you’ll need to set up an API key so the appliance can communicate with the cloud console.
Go to Settings > API Access and select “Add API Key”. Set the access level to custom and select Sensor Gateway from the custom access level drop down list:

Save the information as we’ll need it later.
Next is to generate a certificate that will be used on the appliance. You can skip this part if you use self-signed certificates instead but if you go with certificates you’ll the certificate in pem format with private key file and also the full chain, so including the appliance certificate.
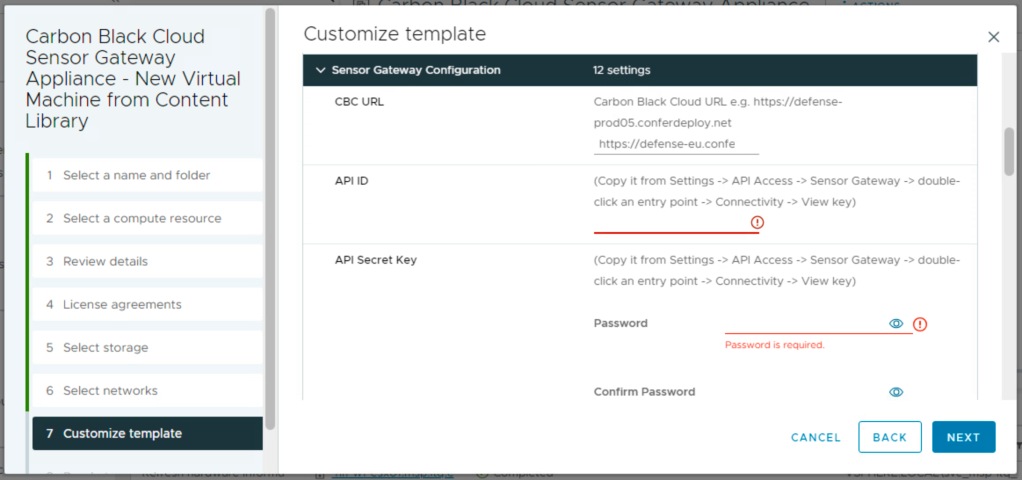
Now we can deploy and configure the virtual appliance. For the CBC URL you can find the necessary information here: https://developer.carbonblack.com/reference/carbon-black-cloud/authentication/#hostname. The API ID and secret you saved before.

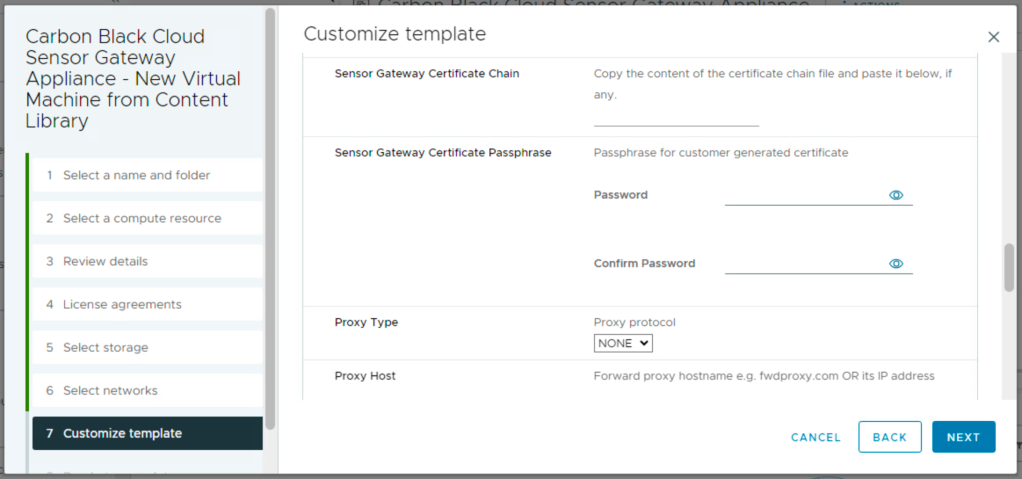
The entry point is the FQDN (preceded by https://) of the appliance (this information must match the certificate common name or san). The certificate line accepts more then just one line of data. You can put in the data from the pem certificate file. Same for the private.

Remember in the certificate chain put the full chain, so the certificate again and then intermediate (if used) and the root certificate. Passphrase is used if the certificate is encrypted with a password.

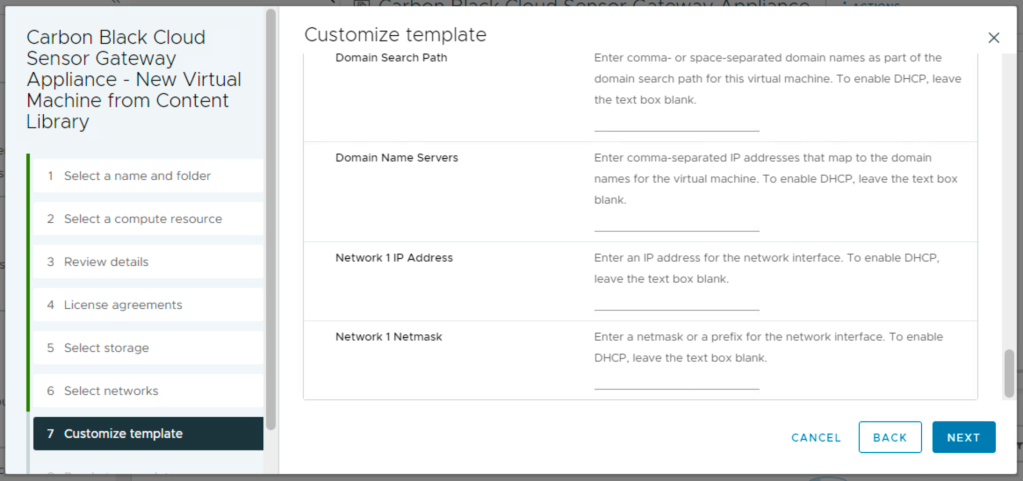
Last thing before deployment is the network information part.

After you boot the appliance you will see that it registers itself in the Carbon Black Cloud console under Settings > API Access > Sensor Gateways.

Now for the installation part of the sensors. You’ll see that you now have an option to generate a registration key through a Sensor Gateway. All devices installed with this new key will connect threw the Sensor Gateway Appliance instead of registering directly to Carbon Black Cloud console.


