This guide is based on VMware Docs and kb artitcle 94182
To connect vCenter to Azure AD (Entra ID) we need to create an OpenID Connect Application using the new app integration wizard:
In Azure AD go to App registrations and select new registration. Fill in the name and select Web for the redirect URI but leave it blank for now.

Go to Certificates & secrets and select New client secret

Copy and save the Value of the newly created client secret. Next enable the following mobile and desktop flows (App collects plaintext password):

Go to the overview tab of the application, copy and save the Application ID.
On the same tab click then Endpoints link and there copy OpenID Connect metadata document link.
Now in vCenter go Administration > Single Sign On > Configuration > Identity Provider and change the provider. Select Azure AD and RUN PRECHECKS.

Name the new directory and configure the domains

Fill in the saved values (App ID, secret value and OpenID link). Before continuing copy the Redirect URI.

Click on the Generate button to generate a secret token. You will need this on the enterprise application later.
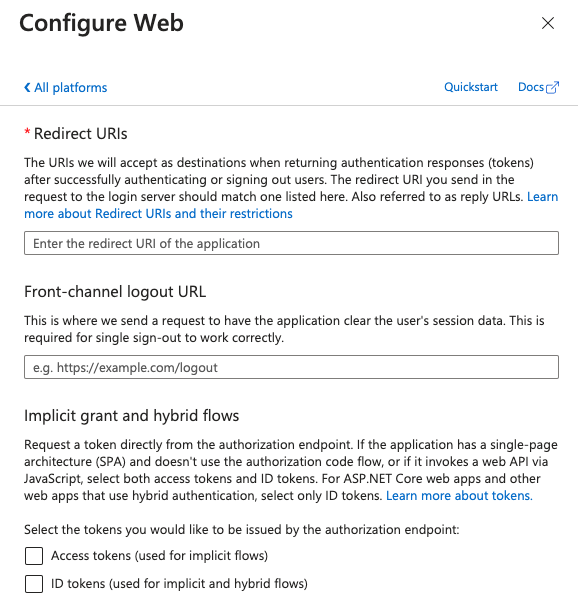
Go back to the Azure app registration and under Authentication select Add a platform. Save the redirect URI from the previous step

Now in Azure AD go to Enterprise applications and create a new application, in the gallery search for VMware Identity Service and create the application.

On the application window go to Provisioning, then manage provisioning. Fill in vCenter Server URL (publicly accessible vCenter Server URL) and the secret token generated in vCenter before.

Go back to the Enterprise application > Users and Groups > Add User/group and select the user(s) and group(s) that you want to provision.
Back in vCenter you must configure group membership before Azure AD users can log in to vCenter Server. Select the Administrator group and edit the members

Select the domain and look for the user(s)/group(s) you want to add by typing the first few characters of the Azure AD object.


